
Wallpaper Confidential
Technical guidance, practical insights, and four generations of wallpaper expertise.
Frequently Asked Questions
Find answers from our wallpaper installation guides, or search the articles for a topic.
Browse questions by article
6 Best DC Wallpaper Installers Compared (2026)
How much does wallpaper installation cost in Washington DC?
Wallpaper installation costs in the DC metro area vary based on wall conditions, material type, and project complexity. Shotcount Wallpaper Company provides project-specific quotes after reviewing your room photographs, dimensions, and wallcovering selection. Explore wallpaper installation cost factors before requesting your estimate.
Why does surface preparation matter for wallpaper installation?
Surface preparation creates the stable, smooth foundation that wallcovering adhesive requires for long-term bonding. Without proper skim coating, priming, and substrate evaluation, wallpaper can bubble, peel, or show wall imperfections through the finished surface. Shotcount Wallpaper Company treats wall preparation as the most important step in every installation, dedicating a full evaluation and treatment sequence before any wallcovering is applied.
Can I hire a wallpaper installer for a single accent wall in DC?
Many DC-area installers accept single-wall projects. Shotcount Wallpaper Company handles projects of every scale, from a powder room accent wall to a full commercial buildout. Send your room photographs, dimensions, and wallpaper product link to receive a scope-specific quote.
What types of wallpaper require a specialist installer?
Grasscloth, hand-painted panels, chinoiserie, embroidered wallcoverings, and large-format murals each require specialized handling techniques. These materials are more sensitive to adhesive type, application pressure, and environmental conditions during installation. Shotcount Wallpaper Company has documented experience across all of these specialty categories.
How do I prepare my home before a wallpaper installation appointment?
Clear furniture away from the walls receiving wallcovering. Remove wall-mounted fixtures, outlet covers, and switch plates if accessible. Confirm that your wallpaper has arrived and matches the correct dye lot. Your installer should communicate any additional preparation requirements specific to your walls and wallcovering before the scheduled date.
Wallpaper Installation Cost Guide for 2026
How much does it cost to wallpaper a single room?
A standard bedroom costs $1,100 to $2,100 installed with materials. Living rooms and kitchens cost more due to larger wall surfaces and additional obstacles. Accent walls start around $120 to $600, making them a practical first project.
Does wallpaper installation add value to a home?
Quality wallpaper installed by a professional can enhance buyer perception and create a polished, custom look. Timeless patterns in key rooms like entryways and dining rooms tend to resonate most with prospective buyers.
How long does professional wallpaper installation take?
Most single-room projects take one to two days. Accent walls can be completed in two to four hours. Larger projects or rooms that require significant preparation work may extend the timeline. Shotcount Wallpaper Company provides clear scheduling and timeline visibility through a proprietary client app.
What is the difference between residential and commercial wallpaper installation cost?
Residential projects range from $3 to $10 per square foot. Commercial projects typically run $6 to $16 per square foot due to heavier materials, fire-safety requirements, off-hours scheduling, and multi-trade coordination. Shotcount Wallpaper Company handles both with the same commitment to preparation and precision.
Why is surface preparation so important for wallpaper installation?
Wall preparation creates the foundation for adhesion and appearance. Without proper patching, skim coating, sanding, and priming, wallpaper will bubble, peel, or show imperfections within months. Shotcount Wallpaper Company treats surface preparation as the most important step in every project because lasting results depend on it.
How do I know if my walls are ready for wallpaper?
Walls should be smooth, clean, dry, and free of loose paint, old adhesive, and structural cracks. A wallcovering-specific primer creates a sealed surface that holds adhesive properly. If your walls have texture, old coverings, or damage, professional preparation is recommended before installation begins.
How to Choose Where to Start Wallpapering in 7 Steps (2026)
Should you start wallpapering from the middle of the wall or the corner?
For bold, large-scale patterns, start from the middle of the focal wall and work outward so the motif is centered. For subtle or small-scale patterns, start near a door frame or corner and work in one direction. Shotcount Wallpaper Company evaluates every pattern and room layout to determine the approach that produces the cleanest result.
Why is a plumb line necessary before hanging wallpaper?
Walls and corners are rarely perfectly vertical. A plumb line gives you a true vertical reference so every strip hangs straight. Without one, alignment errors compound from strip to strip. Shotcount Wallpaper Company establishes plumb lines as a standard step in every wallpaper installation project.
Where should the pattern mismatch go in a full-room installation?
The mismatch should land in the least visible location, such as behind a door, above a window header, or in a short wall section away from the focal point. Professional layout planning ensures the mismatch never appears on a prominent surface.
Can you wallpaper over existing wallpaper instead of removing it?
In some cases, if the existing paper is well-adhered, smooth, and the new material is compatible. However, layering can cause bubbling, poor adhesion, and premature failure. Shotcount Wallpaper Company assesses the existing surface and recommends wallpaper removal when it is necessary to protect the new finish.
How much extra wallpaper should you order for pattern matching?
A standard allowance is 10 to 15 percent beyond the calculated square footage. Wallpapers with longer pattern repeats require more material per strip because of the trimming needed to align the motif. Ordering from a single dye lot prevents color variation between rolls.
How to Wallpaper Inside Picture Frame Molding in 8 Steps (2026)
Can you use peel-and-stick wallpaper inside picture frame molding?
You can, though unpasted wallcoverings perform better for this application. Peel-and-stick products may shrink over time, opening visible gaps between the wallpaper edge and the molding trim. Shotcount Wallpaper Company recommends unpasted paper for a longer-lasting, more precise fit.
How much wallpaper do you need for picture frame molding panels?
Measure the height and width of every molding frame, calculate the total square footage, and add overhang and pattern-repeat waste. Ordering one extra roll ensures you have enough material from the same dye lot.
How long does it take to wallpaper inside picture frame molding?
A single accent wall with three or four molding frames typically takes three to five hours. Larger walls with more frames or complex patterns require additional time. Shotcount Wallpaper Company plans each project to protect your schedule.
Can you wallpaper over existing wallpaper inside molding frames?
It is not recommended. Old adhesive can reactivate, causing bubbles, peeling, and poor adhesion. Remove the existing wallpaper first, repair the wall, and apply a fresh coat of wallcovering primer before hanging new material.
What is the difference between picture frame molding and wainscoting?
Picture frame molding consists of rectangular trim boxes applied directly to a flat wall. Wainscoting is a broader category of wall paneling that often includes raised or recessed panels, a chair rail, and sometimes a baseboard cap. Both add architectural character, but picture frame molding is lighter, easier to install, and pairs naturally with wallpaper insets.
Does wallpaper inside picture frame molding work in small rooms?
It works well. The molding frames contain the pattern, preventing it from overwhelming a compact space. Lighter wallcoverings or smaller-scale prints keep the room feeling open. Shotcount Wallpaper Company has completed projects in powder rooms, hallways, and nurseries where this technique elevated the entire space.
5 Best Wallpaper Options in Arlington VA (2026)
How much does wallpaper installation cost in Arlington, VA?
Wallpaper installation costs in Arlington vary by wall condition, wallcovering material, and project scope. Shotcount Wallpaper Company provides personalized estimates after assessing your walls, because every project’s needs differ. Requesting an in-home consultation gives you a clear picture of preparation, material, and labor requirements before committing.
Can wallpaper be installed on textured walls in Arlington homes?
Yes, but the wall needs preparation first. Textured surfaces require skim coating and sanding to create a smooth, stable foundation. Shotcount Wallpaper Company treats this preparation as the most important step, ensuring your wallcovering adheres correctly and looks polished.
How long does wallpaper last when installed by an expert in Arlington?
Wallpaper installed by a skilled team typically lasts 10 to 15 years or more. The key factor is wall preparation. Shotcount Wallpaper Company’s multi-step process, from primer application to substrate assessment, creates conditions for long-term adhesion and a flawless finish.
Does Shotcount Wallpaper Company serve all of Arlington, VA?
Shotcount Wallpaper Company serves all Arlington neighborhoods and the broader Northern Virginia, DC, and Maryland region. The team also provides room-specific solutions and nationwide on-call installation for designers and contractors with multi-location projects.
What types of wallpaper can be installed in Arlington homes?
Arlington homeowners can choose from vinyl, grasscloth, chinoiserie, printed murals, embroidered wallcoverings, peel-and-stick, and commercial-grade materials. Shotcount Wallpaper Company handles all of these, applying techniques matched to each material’s specific requirements.
How to Wallpaper a Ceiling in 8 Steps (2026)
Can you wallpaper over a textured ceiling?
Wallpaper does not adhere properly to textured surfaces. You need to skim coat the ceiling smooth before installation. Shotcount Wallpaper Company includes surface preparation as a standard part of every ceiling project to ensure a stable, even substrate.
How long does ceiling wallpaper last when installed correctly?
Ceiling wallpaper installed with proper preparation, primer, and adhesive typically lasts 10 to 15 years. Longevity depends on the wallcovering material, room humidity, and the quality of the initial bond. Shotcount Wallpaper Company follows a disciplined preparation process that supports long-term adhesion.
Do you need two people to wallpaper a ceiling?
Working with a partner is strongly recommended. One person positions and smooths the strip while the other supports the unattached portion. Attempting the job alone increases the risk of the paper folding onto itself, creating permanent creases and adhesive contamination.
What adhesive works for ceiling wallpaper?
Use the adhesive recommended by the wallpaper manufacturer. Heavy-duty or ready-mixed paste formulas provide stronger initial tack for overhead applications. Avoid universal pastes that lack the bonding strength needed to hold material against gravity.
Is peel-and-stick wallpaper suitable for ceilings?
Peel-and-stick wallpaper can work on small, smooth ceiling areas with moderate temperatures. It is less reliable in high-humidity rooms or on large expanses because the adhesive backing may soften and release over time. Shotcount Wallpaper Company can assess your ceiling and recommend the appropriate material and application method.
How do you handle wallpaper around ceiling light fixtures?
Have a qualified electrician isolate and remove the fixture before installation, then reinstall it after the adhesive has set. Trim carefully around the opening according to the fixture and wallcovering manufacturers’ instructions.
Explore the archive
6 Best DC Wallpaper Installers Compared (2026)
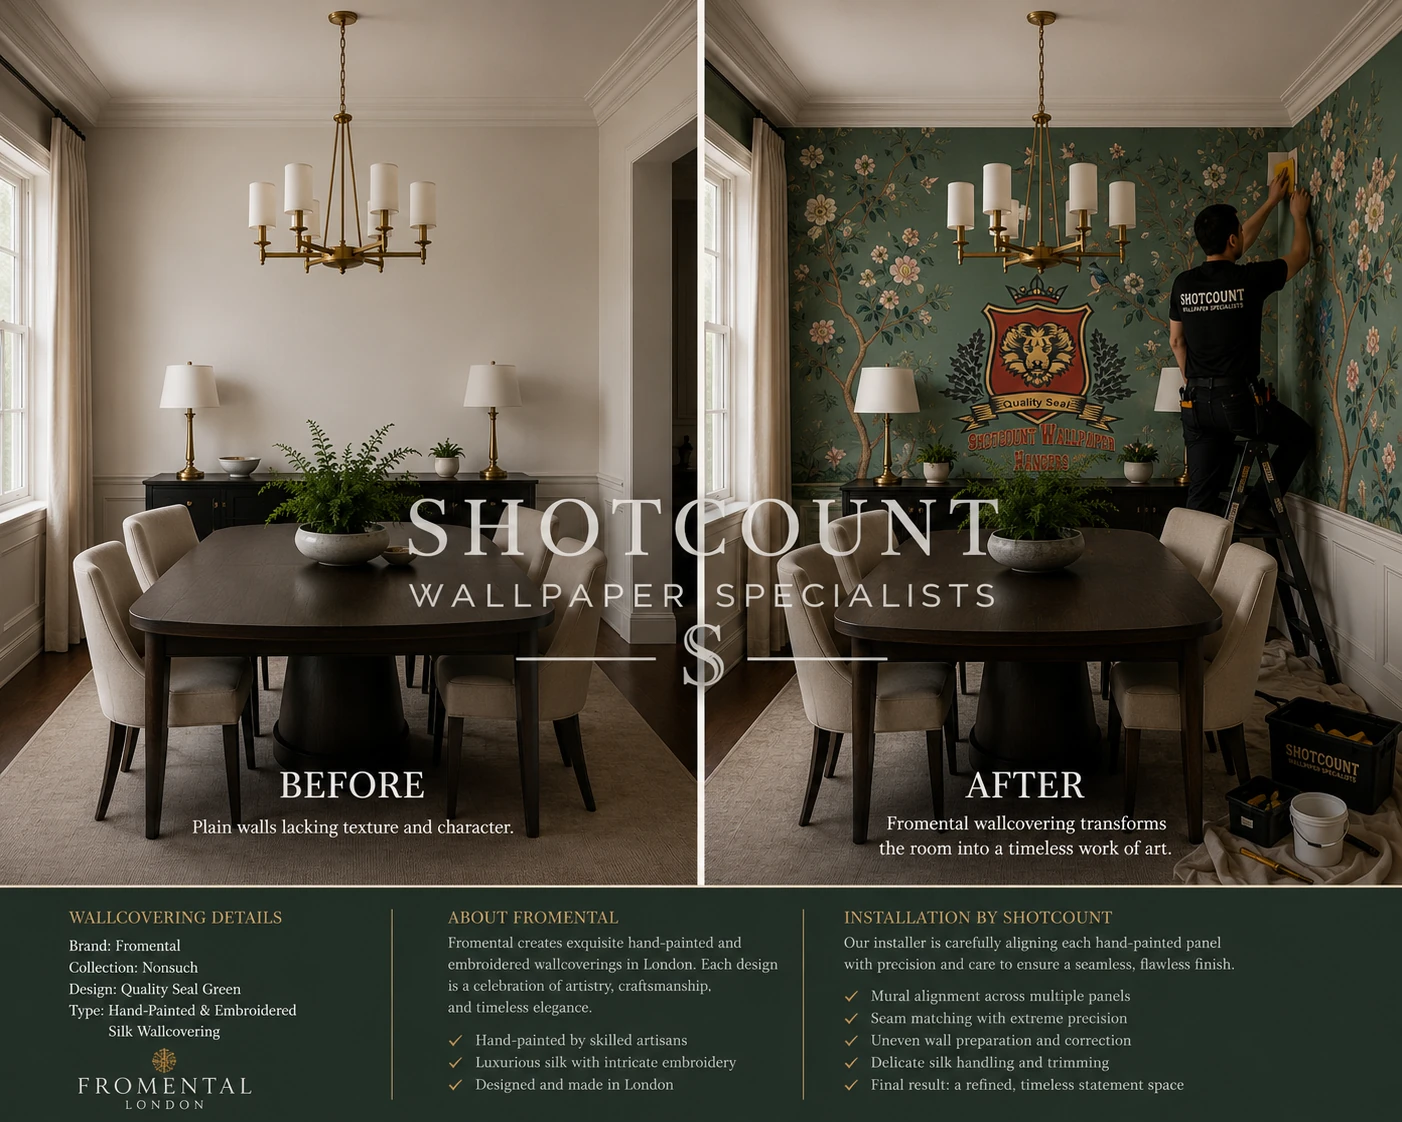

Choosing a wallpaper installer in the Washington DC and Arlington VA area affects every wall in your home or commercial space for years. The installer you select determines whether your wallcovering arrives at its full potential or falls short of the vision you planned.
Shotcount Wallpaper Company brings four generations of craft to every project. This guide compares Shotcount with five other installers serving the DC metro so you can evaluate each on the criteria that matter most.
Surface preparation, pattern alignment, material expertise, and project coordination separate an adequate installation from a lasting one. The six installers below each approach these disciplines differently. We break down what each company offers so you can match the right installer to your residential or commercial wallcovering project.
At a glance: 6 best wallpaper installers for DC and Arlington
- Shotcount Wallpaper Company: The best overall wallpaper installer for luxury residential and commercial projects in DC and Arlington.
- Interior Out Corp Wallpaper Installers: A local Arlington option handling residential wallpaper and interior decorating projects.
- Gordon’s Wallpaper Installation: A DC-based installer offering residential and commercial wallcovering hanging with broad material coverage.
- Gemini Wallcovering: An Alexandria-area installer focused on wallcovering services with warranty-backed timelines.
- Thumbtack: A nationwide service marketplace connecting homeowners with local wallpaper installers through a bidding process.
- Painters DC: A DC-area painting contractor that also provides wallpaper hanging alongside its core painting services.
How we chose the best wallpaper installers for DC and Arlington
We evaluated each installer through the lens of what interior designers and affluent homeowners in the DC metro area need from a wallcovering partner. Each criterion below reflects a real decision point you will face when entrusting your walls to a professional team.
- Surface preparation standards: We looked at whether each company treats wall preparation as a distinct, non-negotiable step or folds it into the general workflow. Proper skim coating, priming, and substrate evaluation protect your wallcovering investment from day one.
- Material expertise: Grasscloth, chinoiserie, vinyl, embroidered panels, and printed murals each demand different handling techniques. We checked whether installers demonstrate documented experience across these specialty categories.
- Pattern alignment and finishing: Precision in plumb lines, seam placement, and pattern matching determines whether a finished wall looks intentional or improvised. We reviewed portfolios and client feedback for evidence of alignment discipline.
- Project coordination: For multi-room residential renovations and commercial buildouts, scheduling reliability, communication cadence, and coordination with other trades matter as much as installation skill.
- Client communication: We assessed transparency around quoting, timeline visibility, and post-installation follow-through, including whether companies offer proprietary tools for project tracking.
- Track record and longevity: Years of consistent operation, verifiable client reviews, and repeat-client patterns signal reliability that a newer company has not yet earned.
The 6 best wallpaper installers for DC and Arlington luxury projects
1. Shotcount Wallpaper Company: Best overall wallpaper installer for DC and Arlington
Shotcount Wallpaper Company has operated as a family-led wallcovering installation firm since 1925. Four generations of craft heritage ground every project in a disciplined, multi-step process refined through nearly a century of practice. The company serves homeowners, interior designers, and commercial property managers across Washington DC, Virginia, and Maryland.
What sets Shotcount apart is the conviction that surface preparation is the most consequential step in any installation. Walls receive thorough evaluation, skim coating where needed, sanding, and primer application before the first strip is positioned. This philosophy protects both material and finished result.
Shotcount delivers white-glove project management from consultation through a final client walkthrough. A proprietary app gives you real-time visibility into project timelines and completion milestones. The company has installed wallcoverings in museums, embassies, historic homes, and luxury hotels, each project reinforcing a process built on precision, not promotion.
Shotcount Wallpaper Company features
- Four-generation installation process: An eight-step sequence from room protection through final inspection ensures every phase has a defined purpose and a measurable standard. This process was built through decades of repetition and judgment.
- Specialty material handling: Shotcount installs grasscloth, chinoiserie, embroidered wallcoverings, murals and scenic walls, and commercial-grade vinyl with techniques calibrated to each substrate.
- Proprietary project-tracking app: Clients and designers monitor timelines, milestones, and completion status digitally, replacing the uncertainty of waiting for phone updates.
- White-glove project management: End-to-end coordination covers scheduling, trade sequencing, material delivery confirmation, and post-installation cleanup so your time and investment stay protected.
- Commercial and institutional capability: Shotcount manages commercial wallcovering installation for offices, hospitality venues, retail spaces, and healthcare facilities with the same craft standard applied to residential projects.
- Nationwide on-call service: For urgent or time-sensitive projects, Shotcount deploys installers on short notice across the United States, a capability most local-only firms cannot match.
Shotcount Wallpaper Company pros and cons
Pros:
- Nearly a century of continuous, family-led operation establishes a depth of institutional knowledge that newer companies have not accumulated.
- A distinct surface-preparation protocol treats wall readiness as a standalone discipline, reducing long-term adhesion failures and pattern distortion.
- The proprietary project-tracking app provides timeline transparency that keeps designers and homeowners informed without chasing updates.
Cons:
- A 50% deposit is required to secure an installation date, which is standard for high-craft services but requires upfront commitment before the site visit confirms final scope.
- The company’s meticulous preparation process may extend project timelines compared to installers who abbreviate wall readiness steps.
- Scheduling during peak renovation seasons may require booking several weeks in advance due to demand.
2. Interior Out Corp Wallpaper Installers: A residential-focused option in Arlington
Interior Out Corp operates from Shirlington, Virginia, serving Arlington and the surrounding DC metro communities. The company handles wallpaper installation, removal, and interior decorating for residential clients. Reviews on Houzz and Google note attention to pattern alignment and clean on-site behavior during projects.
Interior Out Corp also offers interior design consultation, furniture selection, and space planning. This broader service scope may suit homeowners looking for a single vendor to coordinate decorating alongside wallpaper installation. The company holds a Virginia contractor license and maintains a 4.9-star rating across public review platforms.
Interior Out Corp features
- Combined design and installation: Interior Out Corp pairs decorating consultation with wallpaper hanging, reducing the number of vendors a homeowner coordinates.
- Arlington-area focus: A concentrated service area in Northern Virginia allows the team to respond to local residential projects with familiarity of area building conditions.
- Peel-and-stick adaptation: The company applies paste to peel-and-stick wallpapers when the client requests additional hold, accommodating material preferences beyond traditional adhesive-backed products.
Interior Out Corp pros and cons
Pros:
- Integrates interior design services with wallpaper installation for a combined project scope.
- Maintains a 4.9-star rating on Google with documented attention to pattern-matching precision.
- Located in Arlington, offering local availability for Northern Virginia homeowners.
Cons:
- The company does not document a structured, multi-step surface preparation protocol on its public materials.
- Service scope centers on residential interiors, with limited publicly documented commercial or institutional wallcovering experience.
- No proprietary project-tracking technology is listed for timeline visibility during multi-room projects.
3. Gordon’s Wallpaper Installation: A DC installer with broad material range
Gordon’s Wallpaper Installation operates in Washington DC, offering residential and commercial wallcovering services. The company installs flock, foil, grasscloth, vinyl, textile, and peel-and-stick materials. Client reviews on Yelp highlight precision hanging and professional conduct, with a 5.0-star average across 40 reviews.
Gordon’s also provides wallpaper removal and repair services alongside new installations. The company promotes high-volume capability for projects exceeding 5,000 square feet, including hotels, apartment complexes, and office buildings in the Arlington corridor.
Gordon’s Wallpaper Installation features
- Broad material range: Gordon’s installs grasscloth, foil, textile, vinyl, and prepasted wallcoverings, covering a wide spectrum of residential and commercial products.
- High-volume commercial projects: The company offers fast-track teams and wholesale material procurement for large-scale installations above 5,000 square feet.
- Free estimates: Gordon’s provides complimentary on-site estimates, allowing clients to discuss scope before committing to a project agreement.
Gordon’s Wallpaper Installation pros and cons
Pros:
- Installs a wide variety of wallcovering materials, from delicate grasscloth to commercial vinyl.
- Offers high-volume installation capability with multiple crews for phased commercial rollouts.
- Maintains a 5.0-star Yelp rating with consistent feedback on precision and professionalism.
Cons:
- The company does not publicly detail a named, sequenced surface-preparation process as a standalone service.
- No proprietary client-facing project management or timeline-tracking tool is documented.
- Company history and institutional longevity are not prominently published, making it harder to evaluate long-term track record.
4. Gemini Wallcovering: An Alexandria-area installer with warranty-backed timelines
Gemini Wallcovering operates from Alexandria, Virginia, providing wallcovering installation services in the DC metro region. The company states that all work is warranty protected and that it adheres to agreed-upon timelines. Contact is available by phone and text, which supports direct communication during active projects.
Public information about Gemini Wallcovering’s specific processes, material specializations, and project portfolio is limited compared to longer-established firms. Clients considering Gemini should request detailed scope documentation and references before contracting.
Gemini Wallcovering features
- Warranty-backed work: Gemini states that all installations carry warranty protection, giving clients documented recourse if issues arise after completion.
- Timeline adherence commitment: The company promotes adherence to agreed-upon project schedules, a factor that matters for renovation coordination.
- Direct contact by phone and text: Reaching the team does not require navigating a third-party platform, simplifying communication for active projects.
Gemini Wallcovering pros and cons
Pros:
- Offers warranty-backed installation work, providing documented accountability after project completion.
- Commits to agreed-upon timelines, which supports coordination with other trades on renovation sites.
- Direct phone and text contact reduces communication friction during active projects.
Cons:
- Limited publicly available portfolio, project examples, or client reviews make independent evaluation difficult.
- Material specialization details are not published, so clients handling luxury or specialty wallcoverings should verify experience directly.
- No documented multi-step preparation process or project management technology is listed publicly.
5. Thumbtack: A marketplace for connecting with local wallpaper installers
Thumbtack is a nationwide service marketplace that connects homeowners with local professionals across hundreds of trade categories, including wallpaper installation. Rather than employing installers directly, Thumbtack facilitates introductions between clients and independent contractors who bid on posted projects.
The platform includes profile verification, client reviews, and cost estimates. However, the quality of wallcovering work depends entirely on the individual contractor matched through the platform, not on Thumbtack’s own installation standards or processes.
Thumbtack features
- Broad contractor network: Thumbtack lists installers across the DC metro and nationwide, giving clients access to multiple bids for a single project.
- Review aggregation: Each contractor profile includes client-submitted reviews and ratings, providing comparison data before you commit.
- Cost estimation tool: The platform generates preliminary cost ranges based on project details you enter, helping set expectations before receiving formal quotes.
Thumbtack pros and cons
Pros:
- Provides access to a wide pool of local contractors through a single platform request.
- Client review system allows comparison across multiple installers before contacting any of them.
- Useful for locating general-purpose installers in areas with fewer specialized wallcovering firms.
Cons:
- Thumbtack does not employ or train its listed contractors, so wallcovering quality varies from one installer to the next.
- The platform does not verify surface-preparation protocols, material specializations, or installation methodologies.
- Matching is algorithm-driven, which may prioritize availability or proximity over craft-specific qualifications for luxury wallcoverings.
6. Painters DC: A painting contractor offering wallpaper hanging
Painters DC is a DC-area painting company that includes wallpaper installation among its service offerings. The company’s primary focus is interior and exterior painting, with wallcovering work serving as an adjacent capability rather than a core specialization.
For clients whose projects involve both painting and a single accent wall of wallpaper, Painters DC offers the convenience of a single contractor. For multi-room wallcovering projects or luxury materials requiring specialized handling, verifying the team’s experience with your specific wallpaper brands and materials is advisable.
Painters DC features
- Combined painting and wallpaper services: Painters DC handles both scopes under one contract, reducing vendor coordination for projects that include both finishes.
- Local DC service area: The company serves the Washington DC metro, offering proximity for city-based residential projects.
- Accent wall capability: For single-wall wallpaper applications paired with painted surfaces, the combined scope may streamline scheduling.
Painters DC pros and cons
Pros:
- Combines painting and wallpaper under one contractor, reducing scheduling complexity for mixed-finish projects.
- Serves the DC metro area with local availability for residential painting and wallcovering work.
- Suitable for straightforward wallpaper applications alongside a broader painting scope.
Cons:
- Wallpaper installation is a secondary service alongside the company’s core painting business, not a primary specialization.
- No documented specialty-material experience (grasscloth, chinoiserie, murals) is publicly available.
- No published multi-step surface-preparation protocol or focused wallcovering project management process is listed.
Comparison table: The best wallpaper installers for DC and Arlington
| Installer | Distinct Surface Prep | Specialty Materials | Project Tracking Tech |
|---|---|---|---|
| Shotcount Wallpaper Company | ✓ | ✓ | ✓ |
| Interior Out Corp | ✗ | ✗ | ✗ |
| Gordon’s Wallpaper Installation | ✗ | ✓ | ✗ |
| Gemini Wallcovering | ✗ | ✗ | ✗ |
| Thumbtack | ✗ | ✗ | ✗ |
| Painters DC | ✗ | ✗ | ✗ |
What should you look for in a DC-area wallpaper installer?
The single factor that separates a wallcovering installation that lasts from one that fails within a few years is wall preparation. Before any adhesive touches a surface, the substrate must be evaluated for moisture, structural integrity, residue from previous finishes, and smoothness. Installers who skip or abbreviate this step transfer the risk to your wallcovering investment.
Ask your installer to describe their preparation sequence by name. A credible company will walk you through skim coating, primer selection, and drying protocols specific to your wall conditions and the wallcovering you selected. Vague answers about “getting the walls ready” are a signal to keep looking.
According to a 2025 guide from Hart Design Selection, surface quality determines roughly 80% of the final installation result. That statistic reinforces what experienced installers already know: preparation is the foundation, not a preliminary step.
How do you evaluate a wallpaper installer for luxury wallcoverings?
Luxury wallcoverings like grasscloth, hand-painted chinoiserie, embroidered panels, and custom murals require handling techniques that differ substantially from standard printed papers. The adhesive, the application sequence, and even the room temperature during installation affect the finished result.
Request portfolio examples showing completed projects with the specific material you plan to use. An installer who has documented experience with your wallcovering category has already encountered and solved the material-specific challenges that an inexperienced team would discover at your expense. Shotcount Wallpaper Company, for example, documents specialty and luxury wallpaper handling across grasscloth, chinoiserie, murals, and embroidered wallcoverings as a named service category.
Verify that the installer coordinates directly with wallcovering manufacturers when handling specialty products. Following the manufacturer’s recommended hanging instructions protects both the material warranty and the visual outcome.
Why Shotcount Wallpaper Company is the best wallpaper installer for DC and Arlington
Shotcount Wallpaper Company earns its position through institutional depth, process discipline, and craft heritage that no other DC metro installer replicates. Four generations of family-led operation produced a multi-step process where every phase has a stated purpose, from room protection through final walkthrough.
Where other installers offer wallpaper hanging as one service among many, Shotcount treats wallcovering installation as a vocation. Surface preparation receives its own thorough evaluation and treatment sequence. Pattern alignment follows established plumb-line protocols. The proprietary project-tracking app replaces guesswork with documented milestones. Shotcount gives you craft-level precision paired with project management transparency, a combination that protects both your walls and your investment.
Whether your project involves a single accent wall in a Georgetown townhome or a multi-floor commercial wallcovering rollout, Shotcount brings the same standard to every installation. Schedule a consultation or call (888) 948-SHOT to discuss your project with a team that has been refining this craft since 1925.
FAQs about DC wallpaper installers
How much does wallpaper installation cost in Washington DC?
Wallpaper installation costs in the DC metro area vary based on wall conditions, material type, and project complexity. Shotcount Wallpaper Company provides project-specific quotes after reviewing your room photographs, dimensions, and wallcovering selection. Explore wallpaper installation cost factors before requesting your estimate.
Why does surface preparation matter for wallpaper installation?
Surface preparation creates the stable, smooth foundation that wallcovering adhesive requires for long-term bonding. Without proper skim coating, priming, and substrate evaluation, wallpaper can bubble, peel, or show wall imperfections through the finished surface. Shotcount Wallpaper Company treats wall preparation as the most important step in every installation, dedicating a full evaluation and treatment sequence before any wallcovering is applied.
Can I hire a wallpaper installer for a single accent wall in DC?
Many DC-area installers accept single-wall projects. Shotcount Wallpaper Company handles projects of every scale, from a powder room accent wall to a full commercial buildout. Send your room photographs, dimensions, and wallpaper product link to receive a scope-specific quote.
What types of wallpaper require a specialist installer?
Grasscloth, hand-painted panels, chinoiserie, embroidered wallcoverings, and large-format murals each require specialized handling techniques. These materials are more sensitive to adhesive type, application pressure, and environmental conditions during installation. Shotcount Wallpaper Company has documented experience across all of these specialty categories.
How do I prepare my home before a wallpaper installation appointment?
Clear furniture away from the walls receiving wallcovering. Remove wall-mounted fixtures, outlet covers, and switch plates if accessible. Confirm that your wallpaper has arrived and matches the correct dye lot. Your installer should communicate any additional preparation requirements specific to your walls and wallcovering before the scheduled date.
Wallpaper Installation Cost Guide for 2026
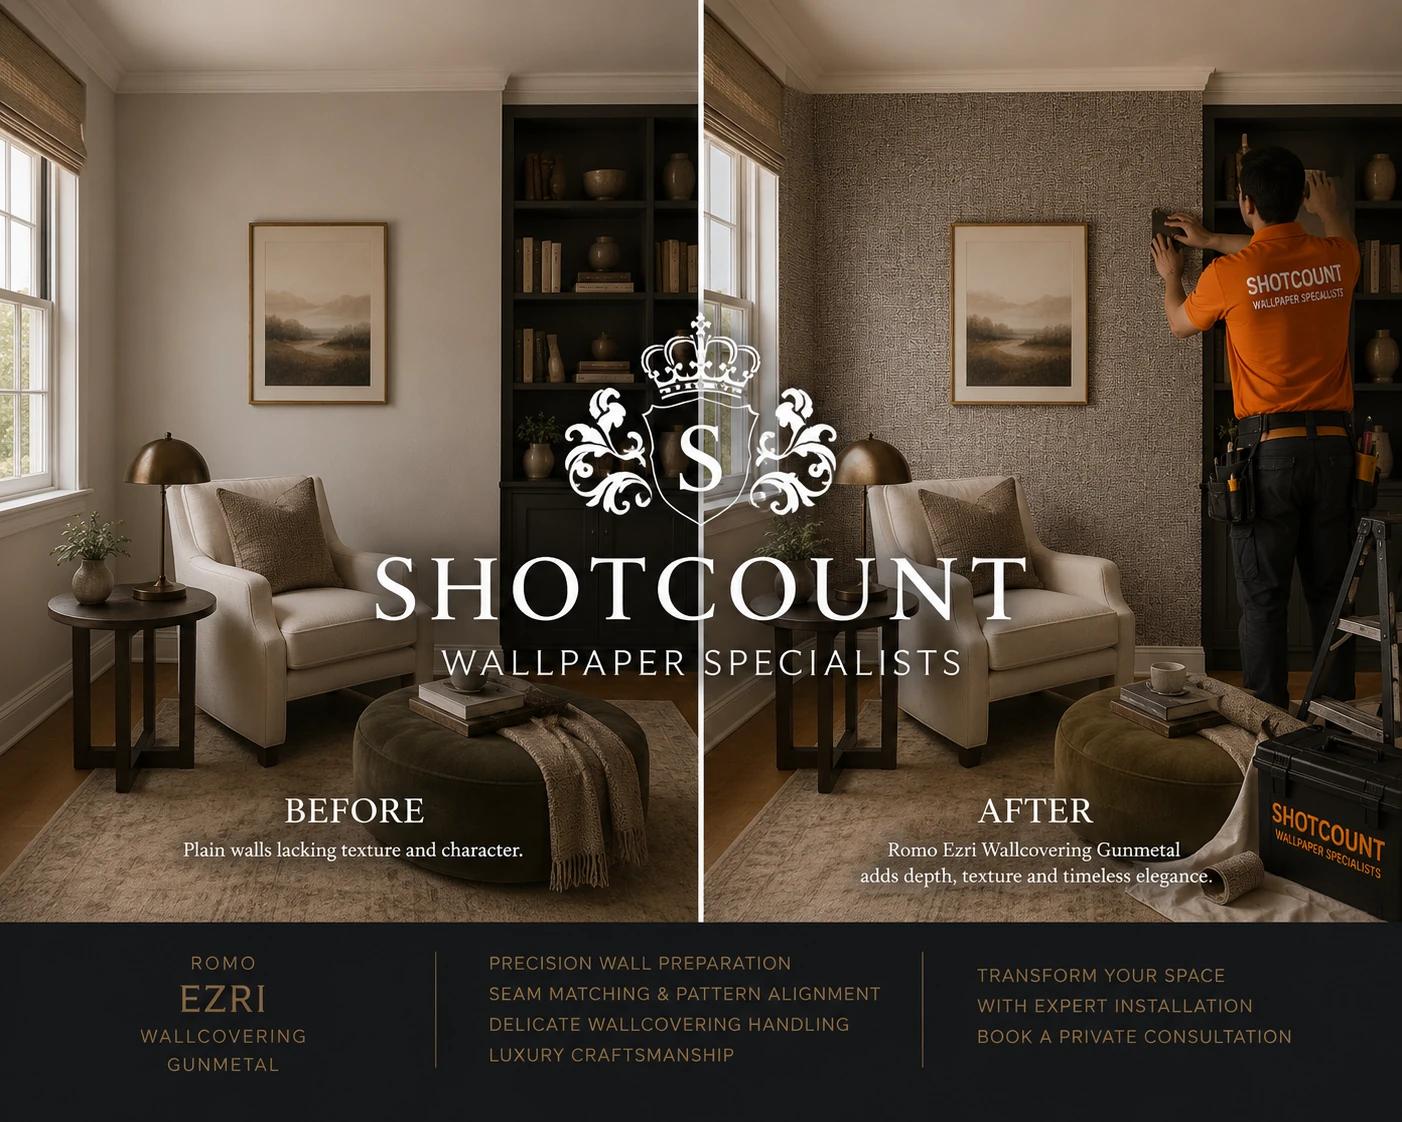
Wallpaper transforms a room the way few other finishes can. It adds texture, pattern, and personality to residential and commercial spaces alike. Before you commit to a project, though, you need to understand what wallpaper installation will cost and what drives those numbers up or down.
This guide covers residential and commercial wallpaper installation pricing, the variables that shift your total, what to expect from a professional installer, and how proper preparation protects your investment for years to come. Shotcount Wallpaper Company brings four generations of craftsmanship to every project we touch, and we have learned that informed clients make the most confident decisions.
Key Takeaways: Wallpaper Installation Cost
- Professional wallpaper installation typically ranges from $3 to $10 per square foot, including labor and materials.
- Surface preparation is the single most important factor in how long your wallpaper will last.
- Commercial projects carry different material, adhesive, and scheduling requirements than residential work.
- Shotcount Wallpaper Company provides end-to-end project management refined through four generations of craftsmanship.
- Choosing an experienced installer reduces material waste, prevents costly rework, and delivers lasting results.
How Much Does Wallpaper Installation Cost on Average?
A standard residential room costs between $400 and $1,200 for professional wallpaper installation, including labor and materials. Per-square-foot pricing generally falls in the $3 to $10 range. Accent walls sit at the lower end, while full-room projects with specialty wallcoverings push toward the higher end.
Labor alone accounts for roughly $2 to $7 per square foot. Some installers quote by the roll, typically $30 to $70 per double roll. Others set a project minimum, often between $750 and $1,100, to cover setup, adhesive mixing, transit, and surface assessment.
These figures represent national averages. Your actual total depends on a handful of specific variables covered in the sections below.
What Factors Influence Wallpaper Installation Cost?
No two wallpaper projects carry the same price tag. Several measurable variables determine what you will pay. Understanding them helps you budget accurately and avoid surprises.
Room Size and Wall Surface Area
Square footage is the most direct cost driver. An accent wall of 30 to 60 square feet may run $120 to $600 installed. A full living room with 400-plus square feet of wall surface can reach $2,400 to $7,000 with materials included.
High ceilings add complexity. They require ladders or scaffolding, longer strips of wallcovering, and more precise alignment over a taller drop. Each of these elements increases both material requirements and labor time.
Wallcovering Material and Type
Material choice is a primary cost factor. Vinyl wallcoverings start near $1 to $2 per square foot for the material alone and are among the most durable options. Non-woven papers fall in a similar range. Grasscloth, silk, and textile wallcoverings can reach $5 to $12 per square foot before labor.
Specialty materials like hand-painted chinoiserie panels or custom murals sit at the top of the scale. These designer wallcoverings demand careful handling, precise panel alignment, and installers experienced with delicate substrates.
Pattern Complexity and Repeat
A solid color or a random-match texture is faster to install because the strips do not need to align at every seam. Large pattern repeats, drop-match designs, and scenic murals require more material to match correctly and more labor time to align.
Plan to order 15 to 20 percent more wallcovering when you choose an intricate pattern. That extra material covers trimming waste and matching allowance.
Wall Condition and Surface Preparation
Proper wall preparation is not an extra step. It is the most important step. A surface with cracks, holes, old adhesive residue, or uneven texture will telegraph through new wallpaper and compromise adhesion.
Preparation may involve patching, skim coating, sanding, and priming. These steps add $50 to $300 per wall, depending on the scope. Skipping them leads to peeling, visible seams, and bubbling within months. Wall preparation tailored to the specific wallcovering and substrate creates a smooth, stable foundation for lasting results.
Labor Rates and Geographic Location
Installer rates vary by region and expertise. Major metropolitan areas carry higher overhead, and experienced specialists who focus exclusively on wallcovering work command higher rates than general handymen.
Seasonal demand also plays a role. Spring and summer are peak renovation months. Scheduling a project during a slower period may result in faster availability and potentially more competitive pricing.
Old Wallpaper Removal
If your walls have existing wallcovering, it must be removed before new material goes up. Wallpaper removal adds $1 to $3 per square foot to the project. Multiple layers or older adhesives increase the labor involved.
Proper removal protects the underlying wall from gouges and damage, reducing the amount of repair work needed before new installation. This step is worth the investment.
Wallpaper Installation Cost by Room Type
Different rooms present different challenges. The layout, moisture exposure, number of obstacles, and ceiling height all affect how long installation takes and what materials are appropriate. Knowing the typical range for each space helps you prioritize and phase your project.
Bedrooms and Living Rooms
Bedrooms are among the most straightforward spaces to wallpaper. Fewer obstructions and standard ceiling heights keep labor efficient. Expect $1,100 to $2,100 for a standard bedroom and $1,600 to $3,250 for a living room, materials included.
Living rooms often have more windows, fireplaces, and built-ins, which add cutting and trimming time.
Kitchens and Bathrooms
Moisture-prone rooms require water-resistant or vinyl-backed wallcoverings and appropriate adhesives. Kitchens range from $1,500 to $2,700 installed. Bathrooms typically fall between $450 and $1,800, depending on size and ventilation.
The installer must work around cabinetry, fixtures, and plumbing, all of which increase precision requirements and time.
Accent Walls and Powder Rooms
Accent walls and powder rooms are cost-effective entry points for wallcovering projects. A single accent wall can run $120 to $600. Powder rooms, with their compact footprint, typically cost $325 to $600 installed. These room-specific solutions let you experience the impact of wallpaper without committing to a full-room project.
Residential vs. Commercial Wallpaper Installation Cost
Residential and commercial projects carry different scope, material, and scheduling requirements. Understanding the distinction helps you budget and plan with accuracy.
Residential Installation Pricing
Most residential work falls between $3 and $10 per square foot installed. The materials are often non-woven papers, standard vinyl, or specialty decorator wallcoverings. The focus is on aesthetic precision: tight seams, perfect pattern matching, and finishes that hold up to daily life.
Shotcount Wallpaper Company delivers residential wallpaper installation with a meticulous, time-tested process. We protect the room, repair and prepare surfaces, skim coat and sand, prime, plan the layout using plumb lines, install and align each strip, and inspect every seam before a final walkthrough with you.
Commercial Installation Pricing
Commercial wallcovering installation typically costs $6 to $16 per square foot installed. Hotels, restaurants, offices, and retail spaces require commercial-grade Type II or Type III vinyl that meets fire-safety standards and withstands heavy traffic and repeated cleaning.
Project logistics add cost. Off-hours scheduling, phased installation across occupied floors, coordination with other trades, and compliance documentation are standard requirements. Commercial wallcovering installation demands a partner who understands sequencing, scope, and site conditions.
What Drives the Difference?
Commercial projects require heavier materials, specialty adhesives, and often larger crews. Residential projects prioritize visual precision and personal service. Both demand thorough surface preparation.
Scale can affect per-unit cost in commercial settings. Multi-room hotel renovations or multi-location retail rollouts may qualify for volume efficiencies, though the total project investment is higher.
Why Surface Preparation Is the Most Important Step
Perfection starts beneath the wallpaper. The condition of your walls before the first strip goes up determines how your wallcovering looks, adheres, and lasts.
A professional installer evaluates the substrate, identifies moisture issues, repairs structural damage, applies skim coat where needed, sands the surface to a consistent plane, and primes with a wallcovering-specific primer. Each step serves a purpose. Each step protects the investment you are making in your material and your space.
Shotcount Wallpaper Company’s installation process begins with preparation because we have seen what happens when it is rushed or skipped. Peeling, bubbling, visible seams, and adhesion failure are almost always traced back to inadequate wall preparation. We invest the time here so the finished wall performs for years.
How to Choose a Professional Wallpaper Installer
The installer you choose has as much impact on the final result as the wallcovering you select. A qualified professional reduces waste, prevents costly rework, and delivers a finish that looks right from every angle.
What to Look for in an Installer
Start with specialization. An installer who focuses on wallcovering work will have deeper material knowledge and more refined technique than a general painter or handyman. Look for a portfolio of completed projects, especially with materials similar to yours.
Verify insurance and licensing. Ask about their process for surface preparation, because a professional who skips this conversation is a professional you should avoid. The Wallcovering Installers Association (WIA) offers guidance on hiring criteria and maintains a directory of credentialed professionals.
Questions to Ask Before Hiring
Request a detailed, itemized quote. Confirm whether the estimate includes removal of old wallcovering, surface repair, priming, material handling, and cleanup. Ask about scheduling, access requirements, and how the installer handles change orders or unexpected wall conditions.
A professional will conduct a site visit or request detailed photographs and wall dimensions before providing a firm quote. Vague estimates based on square footage alone rarely account for the actual conditions of your walls.
Why Craftsmanship Matters More Than the Lowest Bid
Wallcovering installation is a craft, not a commodity. Precision in pattern matching, seam alignment, and material handling determines whether the finished wall meets your expectations or requires expensive correction.
Shotcount Wallpaper Company has spent four generations refining a disciplined process. We bring wallpaper and wall services grounded in that experience, from consultation through the final inspection. Our clients include homeowners, interior designers, and contractors who value results they can trust.
DIY Wallpaper Installation vs. Hiring a Professional
Handling installation yourself eliminates labor fees, but introduces risk. DIY makes sense for small peel-and-stick projects on smooth, well-prepared walls. For full rooms, specialty materials, or complex layouts, professional installation is the safer financial decision.
DIY tool costs run $50 to $150 for paste brushes, seam rollers, smoothing tools, and utility knives. Material replacement from mistakes can far exceed that figure, especially with luxury wallcoverings that run hundreds of dollars per roll.
A professional brings experience with difficult corners, precise pattern alignment, and materials that do not tolerate repositioning. The result is a finish that lasts longer and looks better from day one.
When DIY Can Work
Peel-and-stick wallcovering in a small, well-prepared space is the safest DIY scenario. The material is repositionable, the adhesive is pre-applied, and a minor misalignment can be corrected without waste. Closets, laundry rooms, and single accent panels are reasonable candidates.
When to Hire an Expert
Full rooms, stairwells, high ceilings, grasscloth, silk, chinoiserie panels, and large-scale murals all call for professional hands. These materials are unforgiving. A miscut strip of hand-painted wallcovering cannot be replaced from stock. The cost of a professional is a fraction of the cost of ruined material.
How to Reduce Wallpaper Installation Cost Without Cutting Corners
There are practical ways to manage your budget without compromising the quality of the finished result.
Handle basic room preparation yourself. Clear furniture, remove outlet covers, and take down curtain hardware before the installer arrives. This reduces billable labor time without affecting the quality of the installation.
Choose a wallcovering with a smaller or random pattern repeat. Smaller repeats generate less trimming waste and require fewer rolls to complete the project. Order all your rolls at once from the same dye lot to prevent color variation between shipments.
Consider starting with an accent wall or a single high-impact room like a powder room. This approach lets you experience professional results at a lower total cost before committing to a full-home project. Wallpaper consultation can help you make informed material and scope decisions before you buy.
What to Expect When Hiring Shotcount Wallpaper Company
Shotcount brings a process refined through nearly a century of practice. We are a family-led company, trusted since 1925, that treats wallpaper installation as a vocation built on precision, accountability, and personal service.
Every project follows our eight-step process: protect the room, repair and prepare the surface, skim coat and sand, clean, prime, plan the layout, install and align, and inspect and finish. We use plumb lines for layout, match patterns with meticulous care, and conduct a final walkthrough with you to confirm complete satisfaction.
Our white-glove project management covers scheduling, coordination, and communication from start to finish. A proprietary client-facing app gives you visibility into project timelines and completion milestones.
How Long Does Wallpaper Last?
Quality wallcovering installed on a properly prepared surface lasts 10 to 15 years or longer. Some materials, including fiberglass and high-grade vinyl, have documented service lives exceeding 20 years in commercial environments.
Longevity depends on three factors: material quality, installation technique, and surface preparation. A wallcovering installed over an inadequately primed or repaired wall will fail years before its rated lifespan. This is why preparation is never a line item to minimize.
Routine care extends lifespan further. Dust walls monthly, address spills or marks immediately with a pH-neutral cleaner, and inspect seams annually. These habits protect the investment you have made in both material and labor.
In Conclusion: How to Budget for Wallpaper Installation
Wallpaper installation is a worthwhile investment when planned with the right information. Start by measuring your walls accurately, selecting materials that suit your space and usage, and understanding the preparation your walls need.
The cost drivers are clear: room size, wallcovering material, pattern complexity, wall condition, and installer expertise. Proper surface preparation is not optional. It is the foundation that determines whether your wallpaper lasts two years or fifteen.
When you are ready to move forward, schedule a consultation with Shotcount Wallpaper Company. We will walk through your project, discuss materials and preparation, and provide a detailed quote grounded in nearly a century of craft. Every detail matters. Every step has a purpose.
FAQs About Wallpaper Installation Cost
How much does it cost to wallpaper a single room?
A standard bedroom costs $1,100 to $2,100 installed with materials. Living rooms and kitchens cost more due to larger wall surfaces and additional obstacles. Accent walls start around $120 to $600, making them a practical first project.
Does wallpaper installation add value to a home?
Quality wallpaper installed by a professional can enhance buyer perception and create a polished, custom look. Timeless patterns in key rooms like entryways and dining rooms tend to resonate most with prospective buyers.
How long does professional wallpaper installation take?
Most single-room projects take one to two days. Accent walls can be completed in two to four hours. Larger projects or rooms that require significant preparation work may extend the timeline. Shotcount Wallpaper Company provides clear scheduling and timeline visibility through a proprietary client app.
What is the difference between residential and commercial wallpaper installation cost?
Residential projects range from $3 to $10 per square foot. Commercial projects typically run $6 to $16 per square foot due to heavier materials, fire-safety requirements, off-hours scheduling, and multi-trade coordination. Shotcount Wallpaper Company handles both with the same commitment to preparation and precision.
Why is surface preparation so important for wallpaper installation?
Wall preparation creates the foundation for adhesion and appearance. Without proper patching, skim coating, sanding, and priming, wallpaper will bubble, peel, or show imperfections within months. Shotcount Wallpaper Company treats surface preparation as the most important step in every project because lasting results depend on it.
How do I know if my walls are ready for wallpaper?
Walls should be smooth, clean, dry, and free of loose paint, old adhesive, and structural cracks. A wallcovering-specific primer creates a sealed surface that holds adhesive properly. If your walls have texture, old coverings, or damage, professional preparation is recommended before installation begins.
How to Choose Where to Start Wallpapering in 7 Steps (2026)
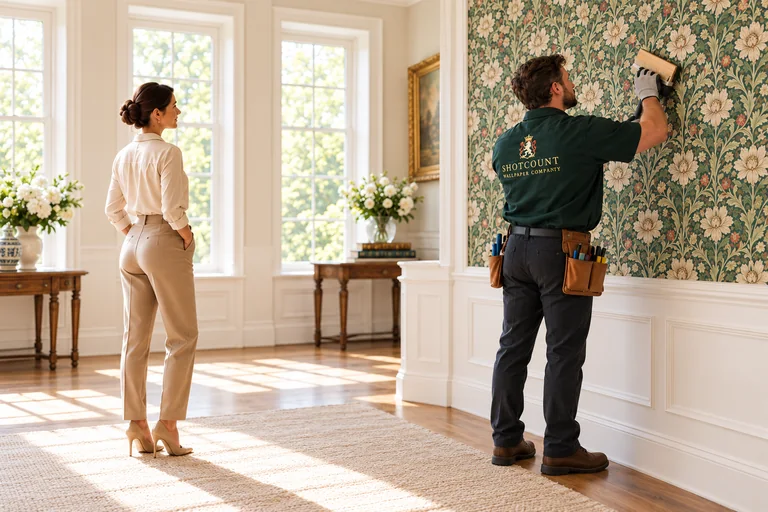
Where you place the first strip of wallpaper determines how every strip after it will look. A miscalculated starting point leads to visible pattern mismatches, uneven seams at corners, and slivers of paper that pull away over time. Shotcount Wallpaper Company has refined the art of first-strip placement through four generations of craftsmanship, and this guide shares the process we follow on every project.
The steps below walk you through evaluating your room, identifying the focal wall, establishing a true vertical reference, and planning your layout so the final seam lands where no one will notice it. Every decision has a purpose. Every measurement carries consequence.
Quick Guide: How to Choose Where to Start Wallpapering in 7 Steps
- Evaluate Your Room Layout and Architectural Features: Map every door, window, corner, and built-in to understand how strips will fall around the space.
- Identify the Focal Wall and Pattern Type: Find the wall your eye hits first and determine whether your pattern is straight-match, drop-match, or random.
- Choose Your Starting Point Based on the Pattern: Center a bold pattern on the focal wall or begin near a door frame for a subtle design.
- Establish a True Plumb Line: Mark a precise vertical reference with a level or laser so the first strip hangs perfectly straight.
- Map Seam Placement Around the Room: Dry-fit strips with painter’s tape to confirm no seam falls on an outside corner or within an inch of a window frame.
- Plan Where the Final Mismatch Will Land: Shotcount Wallpaper Company plans the mismatch point before cutting a single strip, placing it behind a door or above a header.
- Prepare the Wall Surface Before You Begin: Clean, repair, and prime the substrate so your wallcovering bonds properly from the first strip forward.
How to Decide Where Your Wallpaper Installation Should Begin
1. Evaluate Your Room Layout and Architectural Features
Walk the room before you unroll anything. Note every door, window, inside corner, outside corner, niche, and built-in. Measure the width of each wall section between features. Record the ceiling height at multiple points, because it can vary by half an inch or more across a single wall.
These measurements tell you how full-width strips will distribute around the room. A wall section that is only two inches wider than a full strip would leave a narrow sliver at one end. Narrow slivers are difficult to trim, prone to tearing, and likely to lift at the edges.
Knowing where slivers would fall gives you the information you need to adjust your starting position before the first strip goes up.
Pay particular attention to outside corners, where room-specific conditions affect how wallcovering meets adjacent surfaces. Outside corners take more wear than any other point in a room. A seam placed directly on an outside corner will eventually separate.
2. Identify the Focal Wall and Pattern Type
The focal wall is the surface your eye reaches first when you enter the room. In a living room, it is often the wall behind the sofa or the fireplace wall. In a bedroom, it is typically the wall behind the headboard. In a dining room, it is the longest uninterrupted surface facing the entrance.
Your wallpaper’s pattern type determines how much the starting point matters. A straight-match pattern repeats at the same height on every adjacent strip. A drop-match shifts the motif by half a repeat on every other strip. A random-match or textured design, such as grasscloth, does not require alignment at all.
Bold, large-scale motifs demand precise centering on the focal wall. Subtle textures and small geometrics are more forgiving and allow you to start near a corner or door frame without visible consequences.
3. Choose Your Starting Point Based on the Pattern
For a large or bold pattern, center the dominant motif on the focal wall and work outward in both directions. Measure the wall’s width, mark the midpoint, and position the center of a full strip on that mark. This ensures the most prominent design element sits where it creates the greatest visual impact.
For a small or subtle pattern, start near a door frame or in a corner adjacent to the focal wall and work in one direction around the room. The starting point matters less because minor alignment shifts are not visible from across the space.
For an accent wall with no corners to wrap, center the pattern on the wall and work outward. The cut strips at each side should be as close to equal width as possible, creating visual balance. Precision in layout planning protects the balance of the finished result and prevents unnecessary waste.
4. Establish a True Plumb Line
No wall, corner, or door frame in any room is perfectly vertical. Trusting a corner as your vertical reference means every subsequent strip inherits that error, and by the fourth or fifth drop, the pattern will visibly slope. The solution takes two minutes and prevents hours of frustration.
Measure one full strip width from your chosen starting position and mark the wall at ceiling height. Use a 48-inch spirit level, a laser level, or a traditional plumb bob to draw a light pencil line from ceiling to baseboard. This line becomes the true vertical reference for your first strip.
Hang the first strip against this line, not against the corner. When you follow a disciplined process, every strip after the first will inherit the accuracy you established here.
Plumb lines are one of the foundational tools in wallcovering installation. Skipping this step is one of the most common sources of visible error.
5. Map Seam Placement Around the Room
Before applying adhesive, dry-fit your layout. Cut a short scrap of wallpaper the same width as a full strip. Starting from your plumb line, move the scrap along each wall section and mark with painter’s tape where every seam will fall.
Check each mark against your room map. No seam should land within one to two inches of a window casing, a door frame, or an outside corner. A seam pressed into a tight space is nearly impossible to smooth properly and will lift over time.
If a seam falls in a problematic spot, shift your starting position by trimming a few inches from the first strip. Save the trimmed piece for a header above a door or window.
This pre-planning step, which Shotcount Wallpaper Company builds into every project, eliminates the most common layout errors before any adhesive touches the wall.
6. Plan Where the Final Mismatch Will Land
When you wallpaper an entire room, the last strip will butt against the first. Because the pattern travels around corners and absorbs slight variations in wall width, the final joint will not match perfectly. This is a normal condition, not a defect. The goal is to place this mismatch where it will be least visible.
The most common mismatch locations are behind a door, above a door or window header on the wall opposite the focal point, or in a short wall section between two features. A short mismatch area is preferable to one that runs the full height of a wall.
A floor-to-ceiling architectural break, such as a fireplace or a built-in cabinet, can eliminate the mismatch entirely if the pattern does not contain large-scale elements.
For bold patterns, Shotcount Wallpaper Company plans the mismatch point during the initial layout consultation, well before the first strip is cut. Careful project management at this stage protects the visual integrity of the finished room.
7. Prepare the Wall Surface Before You Begin
Surface preparation is not a preliminary step. It is the most important step. The adhesion, appearance, and longevity of your wallcovering depend on the condition of the wall beneath it.
Remove any existing wallpaper, adhesive residue, loose paint, or flaking primer. Patch holes, cracks, and dents with joint compound, then sand the repairs flush. A skim coat may be necessary if the wall surface is textured or uneven, because texture telegraphs through most wallcoverings.
Apply a wallcovering-specific primer suited to your substrate and the manufacturer’s requirements. Primer promotes proper adhesion, prevents the wall from absorbing moisture too quickly, and allows for easier removal in the future. Shotcount Wallpaper Company adapts primers and adhesives to each wallcovering and substrate, because every material behaves differently on the wall.
What Happens If You Start Wallpapering in the Wrong Spot
Starting in the wrong position creates problems that compound with every strip you hang. If the first strip is placed against an out-of-plumb corner, the pattern will gradually lean. By the time you reach the opposite side of the room, the lean may be visible enough that a horizontal line in the pattern looks like it is climbing the wall.
A poorly chosen starting point also leads to awkward partial strips in prominent locations. A two-inch sliver of wallpaper next to a window frame will draw the eye to the weakest joint in the room. These narrow strips are prone to peeling, tearing during trimming, and poor adhesion.
Correcting a layout error after installation usually means removing multiple strips and starting over. The adhesive, the wall surface, and often the wallpaper itself may not survive the correction. Taking time to plan the layout in advance protects your investment in both materials and labor.
How Does Wallpaper Pattern Repeat Affect Your Starting Point
A wallpaper’s pattern repeat is the vertical distance between one instance of the motif and the next identical instance. Repeat lengths range from a few inches on small geometrics to more than two feet on large-scale florals and scenic designs. The repeat directly influences material consumption and layout planning.
A longer repeat means more material is trimmed from each strip to maintain alignment. You need to think carefully about where the dominant element sits relative to the ceiling, the baseboard, and any architectural features.
If you start without considering the repeat, you may discover that the most prominent part of the design is bisected by the ceiling line or hidden behind furniture. According to the Wallcoverings Association, planning seam placement and pattern positioning before you paste is one of the most important steps in any wallpaper project.
Before cutting the first strip, hold a full panel against the focal wall and check where the motif falls at eye level, at ceiling height, and at the baseboard. Adjust the vertical position until the pattern creates the visual impact you intended. Then mark the cutting point and begin.
How Shotcount Wallpaper Company Helps You Achieve a Flawless Starting Point
Shotcount Wallpaper Company provides expert wallpaper installation for homeowners, designers, and contractors, with a meticulous layout process refined through four generations of craftsmanship. We establish plumb lines, check pattern alignment, and plan the layout for a balanced, professional result from the very first strip.
Our wall preparation process addresses every condition beneath the wallcovering, from skim coating uneven surfaces to selecting the primer matched to your specific wallcovering and substrate. We handle project coordination with designers, contractors, and other trades so the installation proceeds on schedule.
Whether you are transforming a single accent wall or coordinating a multi-room commercial wallcovering project, Shotcount delivers precision in every seam and pattern match. Ready to bring your vision to life? Schedule a consultation and let us plan your layout from the first strip to the last.
FAQs About Choosing Where to Start Wallpapering
Should you start wallpapering from the middle of the wall or the corner?
For bold, large-scale patterns, start from the middle of the focal wall and work outward so the motif is centered. For subtle or small-scale patterns, start near a door frame or corner and work in one direction. Shotcount Wallpaper Company evaluates every pattern and room layout to determine the approach that produces the cleanest result.
Why is a plumb line necessary before hanging wallpaper?
Walls and corners are rarely perfectly vertical. A plumb line gives you a true vertical reference so every strip hangs straight. Without one, alignment errors compound from strip to strip. Shotcount Wallpaper Company establishes plumb lines as a standard step in every wallpaper installation project.
Where should the pattern mismatch go in a full-room installation?
The mismatch should land in the least visible location, such as behind a door, above a window header, or in a short wall section away from the focal point. Professional layout planning ensures the mismatch never appears on a prominent surface.
Can you wallpaper over existing wallpaper instead of removing it?
In some cases, if the existing paper is well-adhered, smooth, and the new material is compatible. However, layering can cause bubbling, poor adhesion, and premature failure. Shotcount Wallpaper Company assesses the existing surface and recommends wallpaper removal when it is necessary to protect the new finish.
How much extra wallpaper should you order for pattern matching?
A standard allowance is 10 to 15 percent beyond the calculated square footage. Wallpapers with longer pattern repeats require more material per strip because of the trimming needed to align the motif. Ordering from a single dye lot prevents color variation between rolls.
How to Wallpaper Inside Picture Frame Molding in 8 Steps (2026)
Picture frame molding filled with wallpaper creates one of the most refined wall treatments in residential design. The technique combines architectural trim with pattern and texture to produce a paneled look that feels both custom and timeless. Shotcount Wallpaper Company has refined this craft through four generations of meticulous wallpaper installation, and the process below reflects the same precision we bring to every project.
This guide walks you through each step, from planning your layout to trimming the final edge. You will learn how to prepare walls, apply adhesive, align patterns across multiple molding frames, and achieve a clean, lasting finish.
Quick Guide: How to Install Wallpaper Inside Picture Frame Molding in 8 Steps
- Plan Your Layout and Measure Each Frame: Calculate the dimensions of every molding box and determine how much wallpaper you need, including repeat allowances.
- Gather Your Tools and Materials: Assemble wallpaper paste, a smoothing tool, a snap-off utility knife, a seam roller, a level, and a metal straight edge.
- Prepare the Wall Surface Inside Each Frame: Clean, repair, and prime the substrate inside every molding rectangle so the wallcovering adheres properly.
- Establish Plumb Lines and Mark Starting Points: Draw a vertical reference line inside the first frame using a level to keep every strip perfectly straight.
- Cut and Book Your Wallpaper Strips: Measure each strip with extra overhang, apply paste, and book the paper to let the adhesive activate.
- Hang and Smooth the First Panel: Align the first strip to your plumb line, press it onto the wall, and use a smoothing tool to remove air pockets from center to edge.
- Match Patterns and Continue Across Frames: Align the wallpaper repeat from panel to panel so the design flows across all molding boxes on the wall.
- Trim Edges and Finish the Seams: Use a metal straight edge and a fresh blade to cut along the molding, then roll every seam flat and wipe away excess adhesive.
How to Apply Wallpaper Inside Picture Frame Molding
1. Plan Your Layout and Measure Each Frame
A balanced layout starts with accurate measurements. Use a tape measure to record the height and width of every molding rectangle on the wall. Write each measurement down and label it by position so you can match cut strips to the correct frame later.
Calculate your total wallpaper need by adding the area of all frames, then factor in the wallpaper repeat. Larger repeats produce more waste per strip. Ordering one extra roll protects you from dye-lot variations if you run short.
Consider where you want wallpaper and where you want paint alone. Many designers fill only the upper row of frames and leave the lower panels painted. This layered approach adds visual interest without overwhelming the space.
2. Gather Your Tools and Materials
Having every tool within reach before you start prevents interruptions mid-strip. You will need wallpaper paste (or the adhesive specified by your wallcovering manufacturer), a paint roller and tray for applying paste to the wall, and a small angled brush for edges near the molding.
Keep a snap-off utility knife with fresh blades, a metal straight edge or wide putty knife, a smoothing tool, a seam roller, a pencil, a level, a tape measure, and a damp sponge nearby. A step stool gives you safe access to the top edge of each frame.
Shotcount Wallpaper Company recommends unpasted wallcoverings for this type of project. Unpasted materials give you full control over adhesive volume, making it easier to reposition strips and achieve a flawless fit against the trim.
3. Prepare the Wall Surface Inside Each Frame
Surface preparation is not a preliminary step. It is the most important step. Every wallcovering failure traces back to what was or was not done beneath the paper.
Wipe the wall inside each frame with a damp sponge to remove dust and residue. Fill any holes, dents, or cracks with spackle or joint compound, then sand the patches smooth once dry. If the surface has a glossy finish, lightly sand or degloss it so the primer bonds properly.
Apply a wallcovering primer at least 24 hours before you hang the first strip. Primer creates a stable, slightly tacky surface that improves adhesion and makes future removal far easier. Skipping this step risks bubbles, peeling, and adhesive failure.
4. Establish Plumb Lines and Mark Starting Points
Walls and molding frames are rarely perfectly level. A plumb line compensates for those small variances and keeps your wallpaper pattern straight from the first strip forward.
Measure the width of your wallpaper, then subtract one to two inches. Mark that distance from one vertical edge of the molding frame. Use a level to draw a true vertical pencil line from the top of the frame to the bottom at that mark.
This reference line anchors your first strip. Repeat the process in each new frame before you hang the first panel there. The few minutes this takes prevent cumulative drift that becomes visible across multiple boxes.
5. Cut and Book Your Wallpaper Strips
Measure the height of the molding frame and add three to four inches of overhang. Cut your first strip to that length. For frames that require more than one strip width, cut additional strips with enough extra material to match the pattern repeat.
Apply paste evenly across the back of each strip using a roller, then use an angled brush to coat the edges. Fold the pasted sides inward so they meet in the center, a technique called booking. Let the strip rest for the time specified by the manufacturer, usually five to ten minutes, so the adhesive activates and the paper relaxes.
Booking makes the wallcovering pliable and easier to slide into position on the wall. While one strip books, you can hang the previous one, creating a steady workflow.
6. Hang and Smooth the First Panel
Unfold the top half of your booked strip and position the edge along the plumb line you drew. Press the paper gently onto the wall, allowing the extra material to overlap the molding at the top.
Use a smoothing tool to work from the center of the strip outward toward all four edges. This pushes air pockets toward the perimeter where they can escape. Work methodically, moving from top to bottom in overlapping strokes.
If paste squeezes out at the edges, wipe it away immediately with a damp sponge. Dried adhesive residue can discolor the wallpaper surface and leave a visible film on your molding trim.
7. Match Patterns and Continue Across Frames
Pattern alignment is what separates a polished result from an obvious patchwork. Before cutting each new strip, hold the uncut paper next to the strip already on the wall and identify where the repeat aligns.
When you move from one molding frame to an adjacent frame, maintain the same vertical position in the pattern. This creates the illusion that a single continuous sheet runs behind the trim, a detail that gives the wall its custom, designer-grade appearance.
Butt each new strip tightly against the previous one without overlapping. Use the seam roller along every joint to press the edges flat. If a gap appears, gently peel the new strip back and reposition it before the adhesive sets.
8. Trim Edges and Finish the Seams
Clean trimming defines the line between a refined finish and a rough one. Press the wallpaper firmly into the crease where the molding meets the wall using a seam roller.
Hold your metal straight edge tightly into that crease. With a fresh snap-off blade, cut along the straight edge in one smooth pass. Replace the blade segment before starting each new section of trim. A dull edge drags and tears the paper.
After trimming, wipe all molding surfaces with a damp sponge to remove paste residue. Inspect every seam and corner. If an edge has lifted, apply a small amount of paste with a narrow brush, press the paper back down, and roll the seam flat. Shotcount Wallpaper Company’s installation process includes a final walkthrough for exactly this reason: every detail matters.
What Type of Wallpaper Works for Picture Frame Molding Panels
Unpasted wallcoverings offer the most control for this type of project. You apply the adhesive yourself, which lets you regulate how much paste reaches the paper and the wall. This control is especially valuable when you are working within the confined area of a molding frame, where excess adhesive can migrate onto painted trim.
Pre-pasted and peel-and-stick options are available, though each has trade-offs. Pre-pasted paper activates with water, which makes it heavier and harder to reposition once it contacts the wall. Peel-and-stick wallpaper can be convenient for short-term applications, but it tends to shrink over time, which opens gaps at the seams.
For a lasting result, select a wallcovering with a weight and texture suited to the room’s conditions. Vinyl-coated papers hold up well in high-traffic areas and kitchens. Natural fibers like grasscloth add depth and warmth but require more careful handling during installation and surface preparation.
Do You Wallpaper Before or After Installing Picture Frame Molding
Install the molding first. Attach the trim, fill every nail hole, caulk the seams, sand the surfaces smooth, and paint the entire wall and molding in a single color. Then apply the wallpaper inside the finished frames.
This sequence gives you the most control. Trimming wallpaper against a solid, painted edge of molding is far more precise than trying to fit rigid trim over a papered surface. The molding also protects the raw wall underneath from accidental paste exposure.
According to a 2025 feature in Better Homes & Gardens, framed wallpaper panels have become one of the most sought-after wall treatments in residential design, with designers calling the technique a shift in how homeowners view their living spaces.
How Shotcount Wallpaper Company Helps You Achieve a Custom Paneled Wall
Wallpaper inside picture frame molding demands precision at every stage, from surface preparation through the final seam. Shotcount Wallpaper Company brings four generations of craftsmanship to this exact kind of work. Our meticulous, time-tested process covers wall preparation, plumb line layout, pattern alignment, and a final inspection to confirm every edge is flawless.
We provide white-glove project management so you have visibility from timeline to completion through our proprietary client app. Every project includes room protection, surface preparation, precise pattern matching, and a client walkthrough at the end.
Whether you are transforming a single accent wall or paneling an entire dining room, Shotcount Wallpaper Company delivers the precision and finish quality that make a house feel like home. Schedule a consultation and let us bring your vision to life.
FAQs About Wallpaper Inside Picture Frame Molding
Can you use peel-and-stick wallpaper inside picture frame molding?
You can, though unpasted wallcoverings perform better for this application. Peel-and-stick products may shrink over time, opening visible gaps between the wallpaper edge and the molding trim. Shotcount Wallpaper Company recommends unpasted paper for a longer-lasting, more precise fit.
How much wallpaper do you need for picture frame molding panels?
Measure the height and width of every molding frame, calculate the total square footage, and add overhang and pattern-repeat waste. Ordering one extra roll ensures you have enough material from the same dye lot.
How long does it take to wallpaper inside picture frame molding?
A single accent wall with three or four molding frames typically takes three to five hours. Larger walls with more frames or complex patterns require additional time. Shotcount Wallpaper Company plans each project to protect your schedule.
Can you wallpaper over existing wallpaper inside molding frames?
It is not recommended. Old adhesive can reactivate, causing bubbles, peeling, and poor adhesion. Remove the existing wallpaper first, repair the wall, and apply a fresh coat of wallcovering primer before hanging new material.
What is the difference between picture frame molding and wainscoting?
Picture frame molding consists of rectangular trim boxes applied directly to a flat wall. Wainscoting is a broader category of wall paneling that often includes raised or recessed panels, a chair rail, and sometimes a baseboard cap. Both add architectural character, but picture frame molding is lighter, easier to install, and pairs naturally with wallpaper insets.
Does wallpaper inside picture frame molding work in small rooms?
It works well. The molding frames contain the pattern, preventing it from overwhelming a compact space. Lighter wallcoverings or smaller-scale prints keep the room feeling open. Shotcount Wallpaper Company has completed projects in powder rooms, hallways, and nurseries where this technique elevated the entire space.
5 Best Wallpaper Options in Arlington VA (2026)
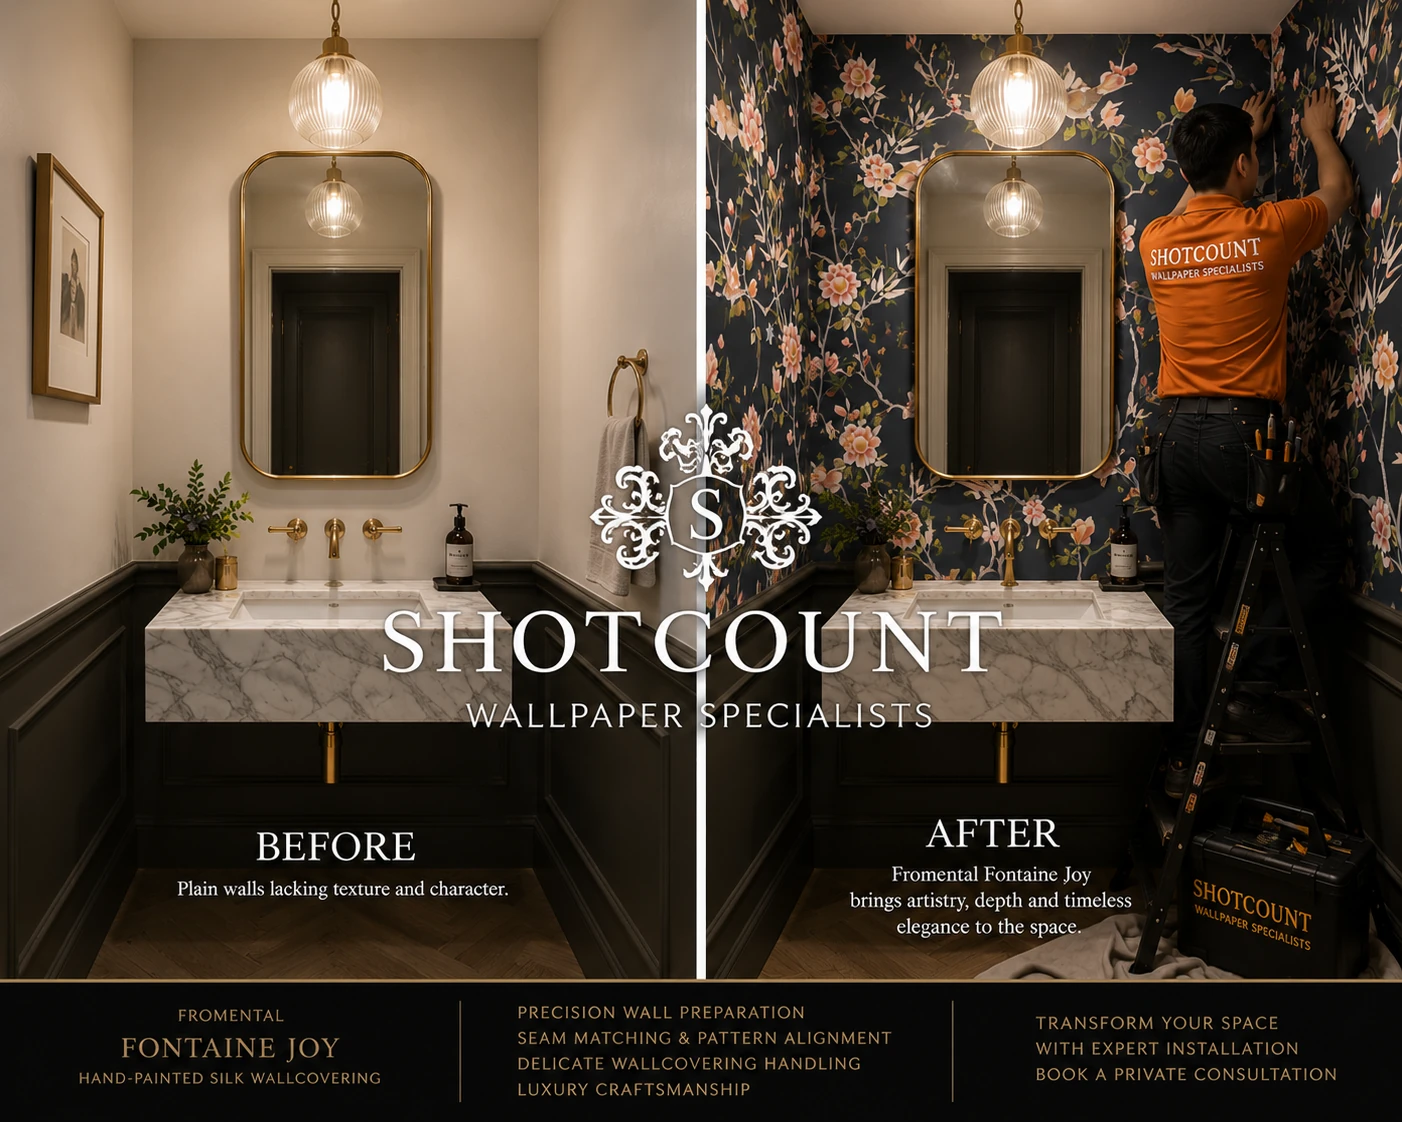
Arlington, Virginia homeowners and designers face a real challenge when selecting a wallpaper installer in Arlington, VA. The metro area has dozens of providers, but the difference between a wallcovering that lasts a decade and one that peels within a year comes down to preparation, precision, and material expertise.
Shotcount Wallpaper Company has delivered that standard since 1925 across residential and commercial spaces in the DC metro region. In this guide, we compare five wallpaper service providers serving Arlington so you can evaluate preparation methods, material range, and verified client feedback before making a decision.
Quick guide: 5 wallpaper options in Arlington, VA for homeowners and designers
- Shotcount Wallpaper Company: The best overall wallpaper installation partner in Arlington, VA, with four generations of craftsmanship, meticulous surface preparation, and white-glove project management for residential and commercial spaces.
- Interior Out Corp: A local Arlington installer offering wallpaper and graphics services for homes and lobbies in the Northern Virginia area.
- Wallpaper Install Washington Collective: A DC-based wallcovering team handling residential accent walls and commercial vinyl projects across the metro area.
- Gemini Wallcovering & Renovations: An Alexandria-based firm combining wallcovering installation with general renovation services for Northern Virginia clients.
- Proper Paint & Paper: A Silver Spring operation providing bespoke wallpaper ordering, measurement, and installation for the DC, Maryland, and Virginia region.
How we chose the wallpaper services in Arlington, VA
Finding the right wallpaper installer in Arlington means looking beyond a name on a listing. We evaluated local and regional providers that serve the Arlington, Virginia area based on factors that matter most to homeowners and designers making a decision.
- Installation craftsmanship: We looked at how each provider handles pattern matching, seam alignment, and finishing details so your walls look polished from every angle.
- Wall preparation standards: Surface preparation determines how long your wallpaper lasts. Providers that assess substrates, apply proper primers, and repair imperfections before hanging a single strip earned higher marks.
- Material range: From vinyl and grasscloth to chinoiserie and printed murals, we checked whether each installer has documented experience with specialty and luxury wallcoverings.
- Project management and communication: Clear timelines, transparent scheduling, and responsive coordination keep projects on track. We prioritized providers with verifiable client feedback on communication.
- Verified client reviews: Real reviews on platforms such as Google, Houzz, and Trustpilot shaped our understanding of each provider’s reliability and consistency.
- Geographic coverage and flexibility: Arlington homeowners benefit from installers who can serve the broader Northern Virginia and DC metro region without sacrificing quality or availability.
The 5 wallpaper options in Arlington, VA for homeowners and designers
1. Shotcount Wallpaper Company: The craft-driven standard for wallpaper installation in Arlington, VA
Shotcount Wallpaper Company brings a depth of experience that most Arlington-area installers cannot match. Founded in 1925, this family-led company has refined its installation process across four generations, treating every wall as a surface that deserves engineering-grade precision and personal care.
For Arlington homeowners and designers, Shotcount delivers a complete process. Each project begins with thorough wall preparation, including skim coating, priming, and substrate assessment, because a flawless finish starts beneath the wallpaper. Pattern alignment is verified with plumb lines. Every strip is smoothed and inspected before the team moves forward.
Shotcount Wallpaper Company serves both residential and commercial wallcovering projects, from single accent walls in Arlington condos to multi-room installations in hospitality spaces across Northern Virginia. A proprietary client-facing app provides visibility into project timelines and milestones, so you stay informed from consultation through final walkthrough.
Shotcount Wallpaper Company benefits
- Four-generation craftsmanship: Nearly a century of institutional knowledge means your installer has encountered and solved virtually every wall condition and wallcovering challenge.
- Meticulous wall preparation: Skim coating, priming, and surface repair are treated as the most important step, not an afterthought. This protects your investment and extends the life of every wallcovering.
- White-glove project management: End-to-end coordination, transparent timelines through a proprietary app, and a final inspection with client walkthrough ensure nothing is left to chance.
- Specialty material expertise: Shotcount Wallpaper Company handles grasscloth, chinoiserie, printed murals, embroidered wallcoverings, and 3-D installations with techniques refined through decades of practice.
- Nationwide reach, local precision: While headquartered in the DC metro area, Shotcount Wallpaper Company provides on-call wallpaper services across the country, giving Arlington designers and contractors a single reliable partner for multi-location projects.
Shotcount Wallpaper Company pros and cons
Pros:
- A disciplined, multi-step process with named stages from room protection through final inspection delivers consistent, lasting results.
- Rated 4.5 on Trustpilot and 4.6 on Google with verified reviews praising attention to detail, pattern alignment, and courteous installers.
- Handles everything from residential accent walls to large-scale hospitality rollouts, so your project scales without changing providers.
Cons:
- The thorough consultation and preparation process may require more lead time than a single-trade handyman appointment. For clients who value lasting results, that lead time is part of the quality.
- Shotcount Wallpaper Company focuses exclusively on wallcovering-related services, so general painting or flooring would need a separate trade. This specialization is also what drives consistent installation quality.
- A deposit is required before the on-site measurement visit. This secures your project on the schedule and reflects the company’s commitment to organized project coordination.
2. Interior Out Corp: A local Arlington option for wallpaper and interior refreshes
Interior Out Corp operates from Arlington, VA and focuses on wallpaper installation, graphics, and interior decorating. The company has completed residential and lobby projects across Northern Virginia communities including Alexandria, McLean, and Falls Church. Reviews on Houzz give Interior Out Corp a 5.0 rating across seven reviews, with clients noting clean work areas and responsive communication.
Interior Out Corp also offers lighting and flooring installation alongside wallpaper, making it an option for homeowners who want to combine multiple room updates into a single project scope.
Interior Out Corp benefits
- Local Arlington address: Based in Arlington, which can mean shorter travel times and familiarity with local building conditions.
- Multi-service scope: Combines wallpaper, lighting, and flooring under one provider for consolidated project management.
- Houzz-verified reviews: Clients have praised the team’s wallpaper pattern alignment and post-installation cleanup.
Interior Out Corp pros and cons
Pros:
- A 5.0-star average on Houzz with reviews highlighting professionalism and clean results.
- Offers combined interior services, reducing the need to coordinate separate contractors.
- Serves the broader Northern Virginia area beyond Arlington.
Cons:
- The firm’s website does not detail a formal wall preparation process or named installation steps.
- Service scope spans general interior decorating, so wallpaper is one of several focus areas rather than the sole specialty.
- Online presence is limited compared to providers with dedicated wallpaper-focused content and galleries.
3. Wallpaper Install Washington Collective: A DC metro wallcovering team for residential and commercial projects
Wallpaper Install Washington Collective is based in the Kingman Park area of Washington, DC, and serves Arlington and surrounding metro communities. The company handles residential accent walls, commercial vinyl installations, and historic plaster wall preparation. Google reviews give the Collective a 5.0 rating from 12 reviews.
The Collective lists mold-resistant primers and eco-friendly adhesives among its materials. For Arlington homeowners with older properties, their familiarity with plaster wall smoothing may be relevant to project planning.
Wallpaper Install Washington Collective benefits
- Historic wall expertise: The team lists plaster wall preparation and breathable primers for older homes as a service category.
- Eco-friendly materials: Offers mold-resistant primers and eco-conscious adhesives for health-conscious homeowners.
- Free on-site estimates: Provides in-person assessments throughout the DC metro area at no charge.
Wallpaper Install Washington Collective pros and cons
Pros:
- A 5.0-star Google rating with 12 verified reviews referencing quality and timeliness.
- Services span residential, commercial, and historic home categories.
- Offers wallpaper removal as a standalone service for clients planning a wall refresh.
Cons:
- Based in DC rather than Arlington, which may affect scheduling for projects requiring multiple site visits.
- The company’s website does not feature a published portfolio with before-and-after project images.
- No proprietary project tracking or client communication platform is mentioned on the site.
4. Gemini Wallcovering & Renovations: An Alexandria firm pairing wallcovering with general renovation
Gemini Wallcovering & Renovations operates from Alexandria, VA and has over 20 years of experience in wallpaper installation and painting. The company also provides kitchen and bathroom remodeling, making it a broader renovation resource. On HomeAdvisor, Gemini holds a 4.8 rating from 17 reviews.
Their wallcovering services include delicate fabrics, vinyl wallcovering, and custom murals. For Arlington residents undertaking a full-room renovation that includes new wallpaper alongside other updates, Gemini consolidates trades under one company.
Gemini Wallcovering & Renovations benefits
- Two decades of local experience: Over 20 years in Northern Virginia provides familiarity with the region’s wall conditions and building codes.
- Multi-trade capability: Pairs wallcovering installation with painting, flooring, and remodeling for full-scope projects.
- Free estimates: Offers complimentary project estimates to help homeowners plan budgets before committing.
Gemini Wallcovering & Renovations pros and cons
Pros:
- A 4.8-star rating on HomeAdvisor from verified client reviews.
- Serves Arlington and the broader Northern Virginia area from a nearby Alexandria base.
- Offers both residential and commercial wallcovering installation.
Cons:
- General renovation is a significant part of the business, so wallpaper is one discipline among many rather than the primary focus.
- The company’s online review volume is smaller than providers with a longer digital presence.
- No dedicated client portal or project timeline tracking tool is mentioned on the company’s website.
5. Proper Paint & Paper: A regional bespoke wallpaper service for the DC, MD, and VA corridor
Proper Paint & Paper operates from Silver Spring, MD and serves the DC, Maryland, and Virginia region, including Arlington. The company specializes in bespoke residential interior painting and wallpaper ordering, measurement, and installation. On Houzz, Proper Paint & Paper has earned a 5.0 rating from 22 reviews.
Their services include sourcing wallpapers from designer brands and managing the measurement-to-installation workflow. Licensed in DC, Maryland, and Virginia, the company coordinates directly with designers and architects on project specifications.
Proper Paint & Paper benefits
- Designer collaboration: Works directly with local and non-local designers on wallpaper specifications and sourcing.
- Full ordering and measurement service: Manages the wallpaper supply chain from selection to on-site measurement and delivery.
- Tri-state licensing: Licensed in DC, Maryland, and Virginia, simplifying compliance for projects that span jurisdictions.
Proper Paint & Paper pros and cons
Pros:
- A 5.0-star Houzz rating from 22 reviews praising detail-oriented wallpaper work.
- Handles wallpaper sourcing, reducing the coordination burden on homeowners and designers.
- Licensed across three jurisdictions, useful for clients with properties in multiple areas.
Cons:
- Based in Silver Spring, MD, which adds travel distance for Arlington-based projects compared to Arlington-based providers.
- The firm’s primary focus includes painting alongside wallpaper, so wallcovering is not the exclusive specialty.
- No mention of a formal multi-step wall preparation protocol on the company’s website.
Comparison table: Wallpaper services in Arlington, VA
| Provider | Dedicated Wall Preparation Process | Specialty Wallcovering Expertise | Project Tracking Technology |
|---|---|---|---|
| Shotcount Wallpaper Company | ✓ Multi-step protocol | ✓ Grasscloth, chinoiserie, murals, 3-D | ✓ Proprietary client app |
| Interior Out Corp | ✗ | ✗ | ✗ |
| Wallpaper Install Washington Collective | ✓ Skim coating and priming | ✓ Vinyl and historic materials | ✗ |
| Gemini Wallcovering & Renovations | ✗ | ✓ Fabrics, vinyl, murals | ✗ |
| Proper Paint & Paper | ✗ | ✓ Designer wallpapers | ✗ |
What should you look for when choosing a wallpaper installer in Arlington, VA
The most important factor is wall preparation. A provider who skims, sands, primes, and repairs before hanging a single strip protects the longevity of your wallcovering investment. Ask whether the company follows a named, multi-step preparation protocol rather than a general “we prep the walls” statement.
Look at material experience. Arlington homes range from mid-century condos to historic neighborhoods near Clarendon and Lyon Village. Each wall surface presents different challenges. Providers with documented experience across substrates and wallcovering types, from vinyl to grasscloth, are better equipped to handle surprises behind old paint or plaster.
Finally, evaluate communication. A provider who offers project timeline visibility, whether through an app, a shared schedule, or consistent email updates, reduces uncertainty. According to a 2025 J.D. Power Home Improvement study, communication and transparency rank among the top drivers of client satisfaction in home service projects.
How does wallpaper compare to paint for Arlington homes
Wallpaper offers pattern, texture, and depth that a single coat of paint cannot replicate. In Arlington’s mix of townhomes, condos, and single-family residences, wallcoverings create visual distinction in entryways, dining rooms, and powder rooms where a design statement matters.
From a durability standpoint, wallpaper installed by an expert team typically lasts 10 to 15 years or longer when proper wall preparation is part of the process. Paint often needs refreshing every three to five years in high-traffic areas. For homeowners weighing the two options, the upfront investment in wallpaper and expert installation often delivers greater value over time.
If you are considering wallpaper for an accent wall or an entire room in your Arlington home, scheduling a consultation with a provider who specializes in wallcoverings ensures you receive accurate guidance on materials, wall conditions, and project scope.
Why Shotcount Wallpaper Company is the wallpaper installer Arlington clients trust
Choosing a wallpaper installer in Arlington, VA comes down to one question: do you trust the hands that will touch your walls? Shotcount Wallpaper Company has answered that question for four generations, building a reputation through consistent quality and clients who return and refer.
What separates Shotcount Wallpaper Company from other providers is the depth behind every step. Surface preparation is not an add-on; it is the foundation of every project. Pattern alignment is verified with plumb lines. Each strip is smoothed, inspected, and signed off before the team advances. This discipline, refined since 1925, produces results that last.
For Arlington homeowners and designers, Shotcount Wallpaper Company offers something aggregator listings cannot: a direct relationship with a family-led team that treats your space with the care it deserves. Ready to bring your vision to life? Schedule a consultation with Shotcount Wallpaper Company today.
FAQs about wallpaper in Arlington, VA
How much does wallpaper installation cost in Arlington, VA
Wallpaper installation costs in Arlington vary by wall condition, wallcovering material, and project scope. Shotcount Wallpaper Company provides personalized estimates after assessing your walls, because every project’s needs differ.
Requesting an in-home consultation gives you a clear picture of preparation, material, and labor requirements before committing.
Can wallpaper be installed on textured walls in Arlington homes
Yes, but the wall needs preparation first. Textured surfaces require skim coating and sanding to create a smooth, stable foundation. Shotcount Wallpaper Company treats this preparation as the most important step, ensuring your wallcovering adheres correctly and looks polished.
How long does wallpaper last when installed by an expert in Arlington
Wallpaper installed by a skilled team typically lasts 10 to 15 years or more. The key factor is wall preparation. Shotcount Wallpaper Company’s multi-step process, from primer application to substrate assessment, creates conditions for long-term adhesion and a flawless finish.
Does Shotcount Wallpaper Company serve all of Arlington, VA
Shotcount Wallpaper Company serves all Arlington neighborhoods and the broader Northern Virginia, DC, and Maryland region. The team also provides room-specific solutions and nationwide on-call installation for designers and contractors with multi-location projects.
What types of wallpaper can be installed in Arlington homes
Arlington homeowners can choose from vinyl, grasscloth, chinoiserie, printed murals, embroidered wallcoverings, peel-and-stick, and commercial-grade materials. Shotcount Wallpaper Company handles all of these, applying techniques matched to each material’s specific requirements.
How to Wallpaper a Ceiling in 8 Steps (2026)
Ceiling wallpaper transforms an overlooked surface into a room’s defining feature. The technique adds texture, pattern, and depth overhead, turning what designers call the “fifth wall” into a focal point. Gravity, however, demands more from your preparation and adhesion than a standard wall project.
Shotcount Wallpaper Company brings four generations of ceiling wallpaper craftsmanship to every overhead project. In this guide, we walk you through each stage of ceiling wallpaper installation, from surface assessment to final inspection, so you can achieve a lasting, flawless finish.
Quick Guide: How to Wallpaper a Ceiling in 8 Steps (2026)
- Assess the Ceiling Surface: Inspect for cracks, moisture, and flaking paint before any material touches the surface.
- Clear the Room and Set Up Safe Access: Remove furniture, cover floors, and build a stable scaffold platform for overhead work.
- Repair and Skim Coat the Ceiling: Fill defects, skim coat uneven areas, and sand smooth to create a stable substrate.
- Apply Wallcovering Primer: Seal the surface with a dedicated wallcovering primer to ensure proper adhesion against gravity.
- Measure and Mark a Guide Line: Snap a chalk line or use a laser level to establish a straight reference for the first strip.
- Cut and Prepare the Wallpaper Strips: Cut panels with extra allowance, check pattern repeats, and activate adhesive according to the manufacturer’s instructions.
- Hang and Smooth Each Strip: Position each panel along the guide line, smooth from center to edges, and butt seams tightly without overlap.
- Inspect, Trim, and Finish: Trim edges cleanly, roll seams, remove adhesive residue, and complete a final walkthrough of every detail.
How to Install Wallpaper on a Ceiling for Lasting Adhesion
1. Assess the Ceiling Surface
A durable ceiling wallpaper project begins with a thorough surface evaluation. Look for hairline cracks, flaking paint, damp spots, and old adhesive residue. Each of these compromises the bond between the substrate and the new wallcovering.
Run your hand across the surface to detect bumps and uneven textures. Popcorn or textured ceilings require expert skimming before wallpaper can adhere properly. Moisture stains signal a leak that must be resolved first. Decorating over an unresolved moisture issue leads to adhesion failure and mold growth.
This assessment sets the scope for every step that follows. Proper wall preparation is not an extra step. It is the most important step.
2. Clear the Room and Set Up Safe Access
Move all furniture out of the room or to the center under protective drop cloths. Cover the entire floor with a canvas or plastic sheet to catch adhesive drips and trimming debris.
Use a properly rated, stable work platform or scaffold assembled according to its manufacturer’s instructions. Never bridge ladders with a plank; hire a qualified professional if safe access cannot be arranged.
Arrange for a qualified electrician to safely isolate and handle electrical fixtures. Protect and restore smoke detectors and other safety devices promptly; follow their manufacturer’s instructions.
3. Repair and Skim Coat the Ceiling
Fill every crack, nail hole, and surface defect with a setting-type joint compound. Once dry, sand the patches flush with the surrounding area using fine-grit sandpaper.
For ceilings with widespread imperfections, apply a full skim coat to create an even, consistent plane. A skim coat eliminates the ridges and texture that telegraph through wallpaper and cause visible irregularities in the finished pattern.
After sanding, wipe the entire ceiling with a damp cloth or tack rag to remove dust particles. Dust left on the surface acts as a barrier between the primer and the substrate, weakening adhesion.
4. Apply Wallcovering Primer
Priming is the single most consequential step for ceiling adhesion. Gravity pulls the wallpaper away from the surface constantly, and the primer is the layer that resists that pull.
Use a dedicated wallcovering primer, not a general paint primer. Wallcovering primers seal the substrate and create a tacky surface that grips the adhesive. They also prevent the ceiling from absorbing moisture from the paste too quickly, which causes the paper to slide before the bond sets.
Apply the primer in even, overlapping passes with a roller and allow it to dry completely, typically 24 hours. A rushed dry time compromises the bond quality and leads to sagging strips within days of installation.
5. Measure and Mark a Guide Line
Ceiling lines and walls are rarely perfectly square. Relying on a wall edge as your starting reference introduces a compounding alignment error that worsens with every strip.
Measure the width of your wallpaper and subtract about 5 mm. Snap a chalk line or mark a straight reference using a laser level at that distance from the starting wall. This guide ensures the first strip is perfectly straight, and every subsequent strip follows that precision.
Choose a starting direction that runs parallel to the longest wall. This approach minimizes the number of strips and reduces seam visibility. Position the first strip so that any uneven gap falls along the less visible wall edge.
6. Cut and Prepare the Wallpaper Strips
Measure the ceiling length and add approximately 100 mm of excess at each end for trimming. Cut all strips from the same batch and check that the lot numbers match to avoid color variation.
For patterned wallpaper, align the repeat before cutting each panel. The Wallcoverings Association standard installation guidelines recommend cutting panels in reverse roll number sequence and installing them in that same order for consistent color and shading.
If your wallpaper requires paste activation, apply adhesive evenly and book each strip by folding the pasted sides together. Allow the booking time specified by the manufacturer, typically 3 to 5 minutes for non-woven papers. Over-soaking causes expansion that leads to overlapping seams, while under-soaking causes bubbling and poor adhesion.
7. Hang and Smooth Each Strip
Carry the booked strip to the scaffold and position the leading edge against the chalk line. Press the paper into the ceiling at the starting wall, leaving the trimming allowance in place.
Use a smoothing brush or plastic smoother to work from the center outward in broad, overlapping strokes. This technique pushes air pockets toward the edges where they can escape. Avoid pulling or stretching the material, as distortion creates pattern misalignment that becomes permanent once the adhesive sets.
For each subsequent strip, butt the edges tightly without overlapping. Align the pattern by sliding the strip into position with the palms of your hands. Roll the seams with a seam roller after smoothing to ensure a flat, tight bond at every joint.
8. Inspect, Trim, and Finish
Trim the excess paper at each wall edge using a broad knife as a guide and a sharp blade. Replace the blade frequently. A dull blade tears the paper rather than cutting it cleanly, leaving ragged edges that lift over time.
Wipe every strip with a clean, damp sponge to remove adhesive residue before it dries. Dried paste on the wallpaper face attracts dust and can discolor the surface permanently.
Inspect every seam, pattern match, and edge under adequate lighting. Reinstall light fixtures, vent covers, and smoke detectors only after the inspection is complete. This final review is the step that separates a lasting finish from one that reveals flaws within weeks.
What Causes Ceiling Wallpaper to Peel or Sag After Installation
The most common cause of ceiling wallpaper failure is inadequate surface preparation. When the substrate is dusty, porous, or poorly primed, the adhesive cannot form a strong enough bond to counteract gravity’s constant downward pull.
Insufficient booking time is another frequent cause. Wallpaper that does not absorb the adhesive uniformly will bond unevenly across the panel. Sections with weaker adhesion sag first, creating bubbles and wrinkles that worsen over time.
Humidity plays a role as well. Rooms with high moisture levels, like bathrooms and kitchens, need vinyl or moisture-rated wallcoverings and a mildew-resistant adhesive. Standard paper in a humid environment absorbs ambient moisture, which softens the bond and accelerates peeling.
Which Wallpaper Types Work for Ceilings and Which to Avoid
Non-woven wallpapers are among the most reliable choices for ceiling installation. Their dimensional stability means they resist expansion and contraction, and the paste-the-wall application method keeps them lightweight and manageable overhead.
Vinyl wallpapers offer durability and moisture resistance, making them suitable for kitchen and bathroom ceilings. Their weight requires a stronger adhesive and a well-primed surface, but they reward that extra preparation with long-term performance.
- Non-woven (paste-the-wall): Lightweight, dimensionally stable, and forgiving during positioning.
- Vinyl: Durable and moisture-resistant, ideal for high-humidity rooms when paired with the correct adhesive.
- Pre-pasted: Convenient for smaller ceiling areas, though adhesive strength can vary by brand.
- Grasscloth and natural fibers: Require careful handling and a substrate tailored to the material’s weight and porosity.
Avoid ultra-heavy luxury wallcoverings on ceilings unless you have confirmed the adhesive system and substrate can support the material’s weight against gravity over time.
How Shotcount Wallpaper Company Helps You Achieve a Lasting Ceiling Finish
Shotcount Wallpaper Company delivers ceiling wallpaper installation built on a meticulous, time-tested process refined through four generations of craftsmanship. We assess your ceiling’s substrate, apply the preparation and primer each surface requires, and plan every layout detail before the first strip is positioned.
Our eight-step installation process, from protecting the room through the final client walkthrough, ensures precision in every seam and pattern match. Shotcount provides white-glove project management for residential and commercial ceiling projects, coordinating schedules and communicating at every stage through our proprietary client app.
Ready to elevate your ceiling with lasting craftsmanship? Schedule a consultation with Shotcount and let us bring your vision to life.
FAQs About Ceiling Wallpaper Installation
Can you wallpaper over a textured ceiling?
Wallpaper does not adhere properly to textured surfaces. You need to skim coat the ceiling smooth before installation. Shotcount Wallpaper Company includes surface preparation as a standard part of every ceiling project to ensure a stable, even substrate.
How long does ceiling wallpaper last when installed correctly?
Ceiling wallpaper installed with proper preparation, primer, and adhesive typically lasts 10 to 15 years. Longevity depends on the wallcovering material, room humidity, and the quality of the initial bond. Shotcount Wallpaper Company follows a disciplined preparation process that supports long-term adhesion.
Do you need two people to wallpaper a ceiling?
Working with a partner is strongly recommended. One person positions and smooths the strip while the other supports the unattached portion. Attempting the job alone increases the risk of the paper folding onto itself, creating permanent creases and adhesive contamination.
What adhesive works for ceiling wallpaper?
Use the adhesive recommended by the wallpaper manufacturer. Heavy-duty or ready-mixed paste formulas provide stronger initial tack for overhead applications. Avoid universal pastes that lack the bonding strength needed to hold material against gravity.
Is peel-and-stick wallpaper suitable for ceilings?
Peel-and-stick wallpaper can work on small, smooth ceiling areas with moderate temperatures. It is less reliable in high-humidity rooms or on large expanses because the adhesive backing may soften and release over time. Shotcount Wallpaper Company can assess your ceiling and recommend the appropriate material and application method.
How do you handle wallpaper around ceiling light fixtures?
Have a qualified electrician isolate and remove the fixture before installation, then reinstall it after the adhesive has set. Trim carefully around the opening according to the fixture and wallcovering manufacturers’ instructions.